Related Posts with Thumbnails
Showing posts with label DIY. Show all posts

Thursday, March 22, 2012

Repurposed Vintage Milk Bottle Carrier Chandelier

That post title just rolls right off the tongue, doesn't it? But that is exactly what I have to share with you today, my Repurposed Vintage Milk Bottle Carrier Chandelier!

This is definitely a "look for less" story. A few months ago, I pinned a chandelier I found on shadesoflight.com knowing full well that I would never pay the $999 price tag. See below.


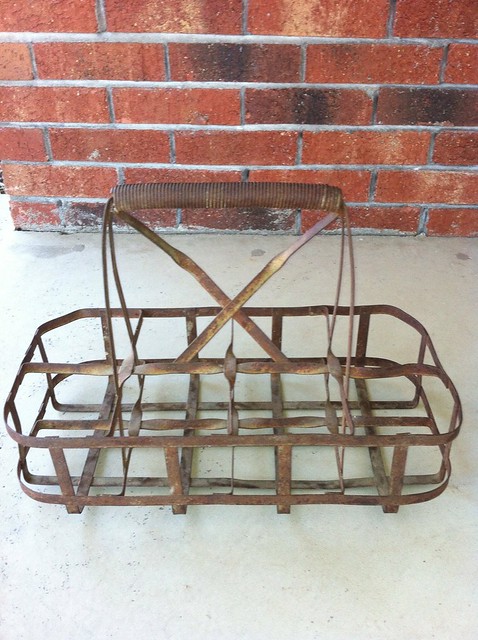
But I didn't forget about it either. It inspired me to hunt online for a vintage bottle carrier of my own to transform into a custom-made light for less.

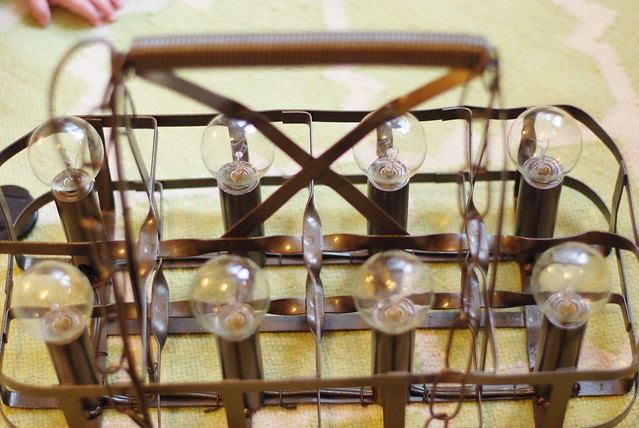
I ended up winning this beauty on eBay back in early February for $37 +$12.50 for shipping (it's dang heavy!) for a grand total of $49.50.

Vintage Milk Carrier - Before 2

With my inspiration photo and my newly won rusty, metal carrier in hand, I enlisted the the help of my trusty friend Joe, who just happens to be an electrician, to execute my master plan.

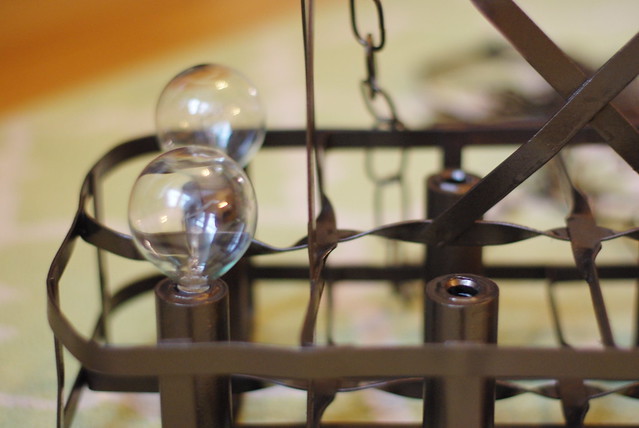
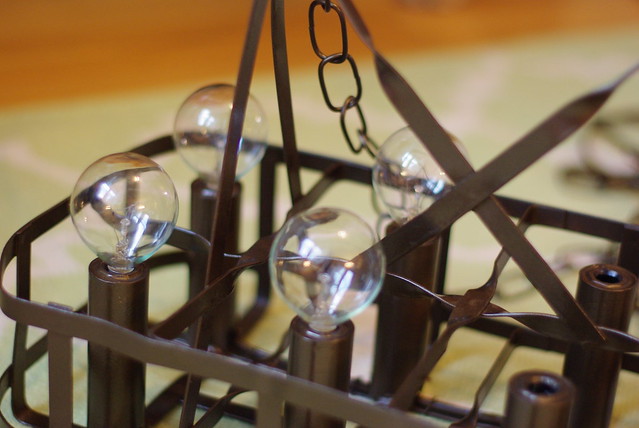
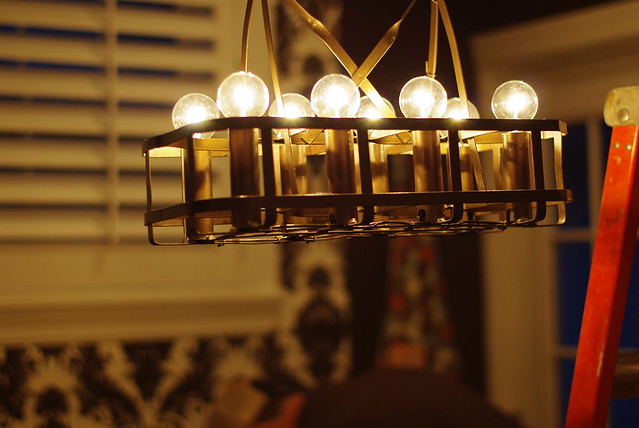
I'm not up on all the technical/electrical lingo here, but from here all I know is that that he welded some things, wired some other things, added the chain and spray painted the rest for a total supply cost of around $80 including light bulbs.

That's right, we have an every-bit-as-good-if-not-better, chandelier for a grand total of $130. That's a savings of $869 if you are keeping track.

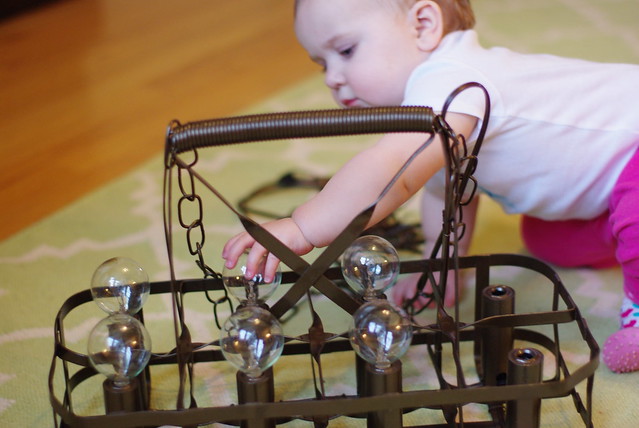
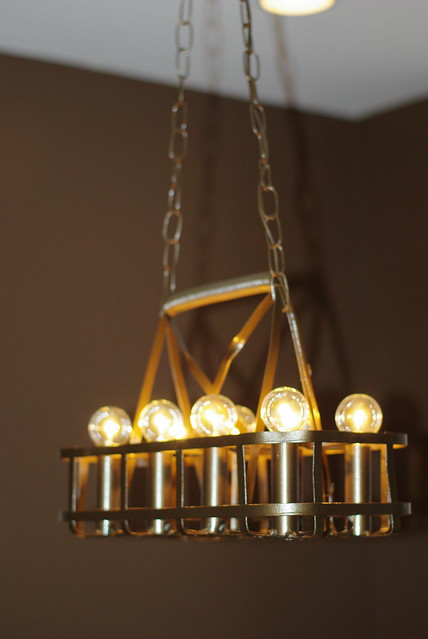
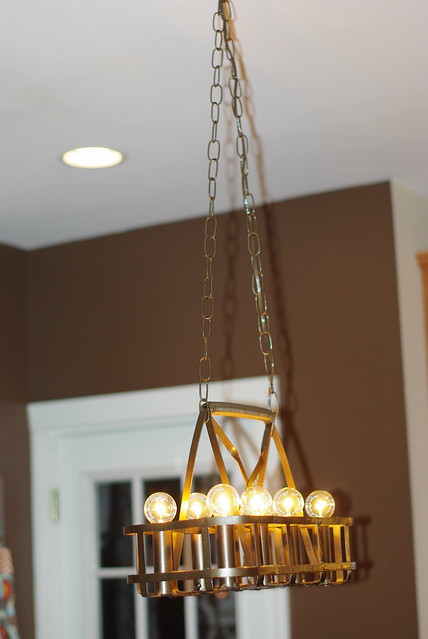
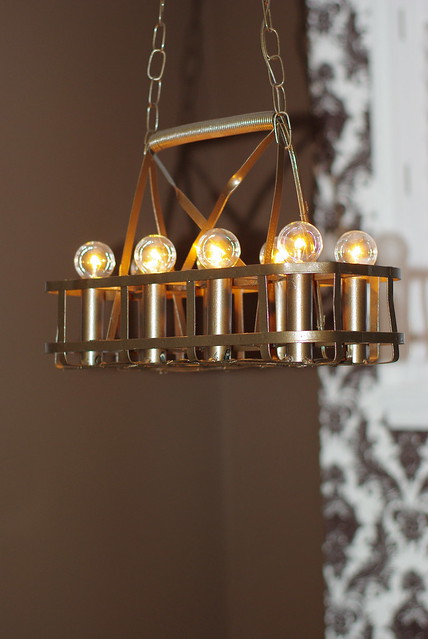
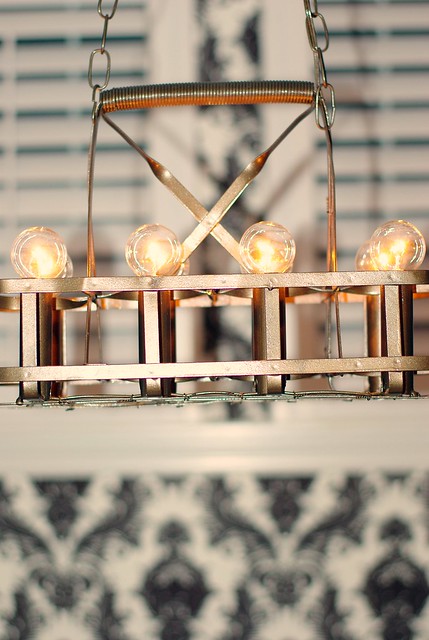
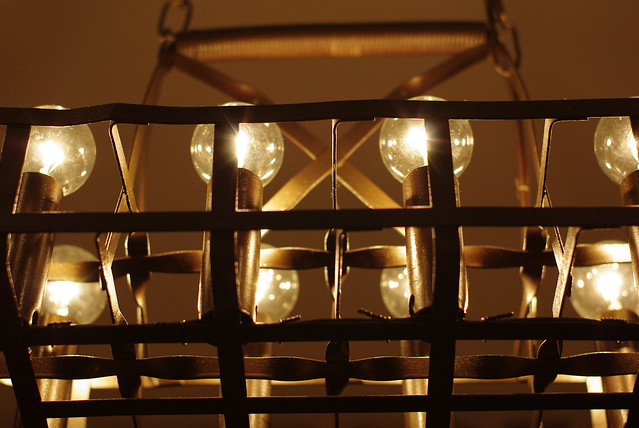
Of course, I did not let Joe's talents go unnoticed, but even with our token of appreciation to him, we still created a wonderful light for less than 1/4 of the retail price found online. Thanks, Joe, for helping bring my vision to light! I couldn't be more pleased; here are the results:

IMGP4357

IMGP4358

IMGP4359

IMGP4364

IMGP4370

IMGP4374
IMGP4375


IMGP4389

IMGP4395

IMGP4396

IMGP4410


IMGP4411

IMGP4414

IMGP4420

IMGP4421

IMGP4432

Monday, February 6, 2012

Vintage Milk Bottle Carrier

I got a special delivery today! It's the muse for my next DIY project for our new home.  A vintage milk bottle carrier!


I can't wait until this project comes to light ;-)

Sunday, April 18, 2010

Vintage Bits and Brooches

Yesterday, I did a quick sweep of the vendors at the Do It Your Own D*mn Self sale here in Logan Square in Chicago and came home with an unexpected stash of vintage brooches and costume jewelry! I got such a steal on a small lot of "vintage bits" and I also splurged for two other pieces, but altogether I spent $16 for a fun little collection.


{THE STEAL}

This little box of "vintage bits" was marked 2 for $1, but when I started digging through and grabbing nine or ten of the pieces, the kind seller said, "You can have the whole box for $2." Well, ok! I'll take it! So I got about 20 pieces of unique, mismatched vintage costume jewelry for less than a tall latte.


{THE SPLURGE}

Since I was on a high from my mega-steal, I apparently left my negotiating skills in the dust as I headed to the next vendor who had a few much larger vintage brooches on display. I immediately gravitated towards two, beautiful enamel floral brooches and was quoted $6 for one and $8 for the other. They were much larger, and in good condition, so I too-willingly forked over $14 for the two.

White, Green and Gold Vintage Enamel & Rhinestone Floral Brooch - $6
<span class=

<span class=

Pink and Yellow Vintage Enamel Floral Brooch - $8

<span class=

<span class=

Here's the entire stash:

<span class=

<span class=

<span class=

<span class=

So what do I plan to do with it all? Well, I said I went there to get inspired and indeed I did. I never expected to come back with what I did, I thought it was more likely for me to find paper or fabric, but now I have a few ideas for how to use vintage costume jewelry. The idea I'm most excited about is the possibility of putting together a brooch bouquet!

I found some nice inspiration pics on wedding blogs and floral sites, like Ruffled, Offbeat Bride, and Fantasy Floral Designs with their entire blog dedicated to brooch bouquets. However, since I am already married, I'd rather create individual stems to keep in a vase around the house or to add in here and there to fresh flower bouquets at home. I'm thinking all I need is some green floral wire and tape. I probably do need a few more pieces though for a full display, unless I just do a few in some bud vases. Hmm... I'll let you know how this pans out!

Thursday, April 15, 2010

do it your own d*mn self 2010

On Saturday, the Chicago Craft Mafia is hosting their annual Do It Your Own D*mn Self sale. This is where Chicago crafters come to sell their extra craft supplies to the general public for super cheap.


I attended this last year, but my browsing time was cut short when my friend who attended with me had her tongue suddenly turn black and we had to leave in a hurry. Funny story... it ended up being a harmless side effect to a medicine she was on, but still scary none-the-less and hilarious after the fact.

This year I am leaving Miss Black Tongue behind and will attend with my sister, who will hopefully be able to pick up some extra fabric scraps for some sewing projects. I just hope to find some inspiration. To make it even more appealing, this year's event is located just a few blocks from my house!

Monday, February 15, 2010

Vintage Luggage Dog Bed Project

My parents have a set of mustard-yellow American Tourister luggage at home that I'm guessing is from the mid-1970's and was probably a wedding gift or purchased early in their marriage. Growing up I thought it was not-so-cute, and after a while it just sat in our storage room while we upgraded to various duffel and roller bags over the years. It looks just like this...

Fast forward 30 years or so, and I am so happy they've kept it around now that vintage luggage is back in vogue (as far as decor goes). Better yet, they said I am more than welcome to take it off their hands! As the saying goes, everything old is new again.

I still need to bring it back from Saint Louis next time I go visit, but that hasn't stopped me from planning exactly what I will do with it! My plan is to make a Vintage Luggage Dog Bed for my Louie-dog. He currently sits/sleeps on an ottoman near our floor to ceiling windows all day, but I think this will make a much cuter hangout.

Here are some of my inspirations pics from etsy seller 'vintagerenaissance' and her suitcase bed collection:

I also did a quick search on where I might be able to find my own mid-century modern legs to attach, and came across this great post on apartment therapy showing very affordable furniture legs from ace hardware.

12-inch legs $4.49 each
Then I would just need our drill and four of these angled leg plates for $2.79 each.
Since the legs are unfinished, I may paint them as well but I'll have to wait and see how it all comes together. Event though I may not be able to reveal this for a month or two since I don't have the suitcases in my possession yet, I still had to share my excitement about this potential new perch for my pup!

Wednesday, May 6, 2009

Telephone Bench Makeover Revealed

A few weekends ago, I ventured to the suburbs and came back with some contraband spray paint (since spray paint is not sold in the Chicago City Limits) in order to finally makeover my telephone bench! I bought primer, clear gloss and yellow, green and aqua blue spray paint.


After much debate I decided that the yellow looked best with the yard of green printed fabric I had picked out, so I went with that. Here is the fabric:


Here is the "before" photo:


And now to the dirty work. First, I removed the seat and sanded the bench with the electric sander:


Next, I primed it:


And finally, I sprayed it yellow and also with a clear gloss:


I also tore the disgusting green vinyl off of the seat, added some new batting and reupholstered it with the new fabric:


And ta-da! My new and improved Telephone Bench:


And here is where it currently rests in our entryway!


Saturday, March 28, 2009

Do It Your Own D*mn Self

Today I'm headed to a fun little event set up by the Chicago Craft Mafia called Do It Your Own D*mn Self : Craft supplies for super cheap!


I'm going with my good friend Julie, who makes jewelry, and I just hope to find some inspiration and maybe some cool fabrics. I'll be post to find our top finds if we end up coming home with some!

Tuesday, March 17, 2009

I found my telephone bench!

I posted back in February about my hunt for a vintage telephone bench to make-over and after multiple craigslist searches for "Telephone Table", "Telephone Bench" and "Gossip Bench" I either came up short, or found pieces that were $100+. I couldn't bring myself to spend that on something that I am going to sand, paint and upholster myself. I also went out two weekends in a row to various local antique stores and re-sale places and never found anything either. But recently my luck changed...


On Sunday, Dave and I headed down to the southside of Chicago, no not for Chicago's infamous South Side Irish St. Patrick's Day Parade, but to pick up the telephone bench I found on Craigslist for only $45. Woo-hoo.

Here are the pics:


I like that it has a full bench, as opposed to a single seat, and while it lacks the drawer I had hoped for, I do like the crisscross detail on the seat back. Not too ornate, but still eye-catching.

So now I need to sand it with my new electric sander and then... choose the paint color! This is going to be a hard one. I want it to be bold, but not an eyesore. I did buy one yard of green patterned fabric and one yard of orange patterned fabric for the seat, but I'm torn on the wood color. Right now I'm leaning towards a deep aubergine or eggplant color, and I think it would look nice with either fabric choice. But I also like the idea of having an aqua color with the orange fabric Or an orange piece with the green fabric.

Any suggestions?

Sunday, March 15, 2009

Mellow Yellow's Mini-Makeover & Reveal

I posted last week about the yellow Ikea HEMNES Linen Cabinet that we purchased and could not wait to put together, and now it's time for the big reveal.


It came is two boxes with three full bags of hardware and a huge book of instructions. Yikes! I usually love putting things together, but I'm not gonna lie, this was pretty daunting.


Luckily, Dave took the reigns and did all the construction.


One thing I was not bargaining for, was the circus tent striped yellow drawers and back of the dresser. So I bought some cute green and white floral contact paper/shelf liner from the Home Depot and am really happy with the results.

Before:


After:


Before and After for the back:


Louie loves it!


And now the bedroom before:


And after:

View of the bed so you can see how it coordinates:


More views:


Ta-da!

Labels

About Me

I'm a St. Louis native, but I have been living in Chicago since 2005 and am loving every windy minute of it. I enjoy cooking (more-so eating), home decorating and really anything creative. I'm a supporter of DIY & handmade goods, a fledgling foodie and a connoisseur of kitsch. I spend my days filling online shopping carts, emptying them and repeating the process all over again. Most of all I love spending time with my husband, Dave, our first child, Claire and my dog, Louie.

Etsy Faves

  © Free Blogger Templates 'Photoblog II' by Ourblogtemplates.com 2008

Back to TOP